Dream Dress Showcase | DOKI DOKI ♡ STRAWBERRY MAGIC JSK II

Hello everyone!

Today we are going to take a look at a dress I absolutely coveted for years before I got my hands on it, DOKI DOKI Strawberry Magic. I first saw it on the rack at an anime convention that Baby the Stars Shine Bright was attending and ended up choosing another dress over this one at the time. It haunted me for years, but the wonderful thing about EGL fashion is that almost everything pops up for sale eventually. And this one popped up for sale with the matching head bow!

I also have the matching wristcuffs and a set of socks with the same lace, but as far as I can tell these socks are not from this release. A similar strawberry lace has been used since as early at 2011 based on what I can find online, so luckily it is somewhat easy to find accessories to match.

The set was originally released in 2018 and it had a lot going on. There are two cuts of JSK, a skirt, a blouse, a headbow, a ribbon hair tie set, wristcuffs and even a mini hat! To be honest even a year ago I might have been skeptical of a mini hat, but looking at it now I would love to get my hands on it.

But for now let’s focus on what we do have. This is the second style JSK featuring a detachable apron.

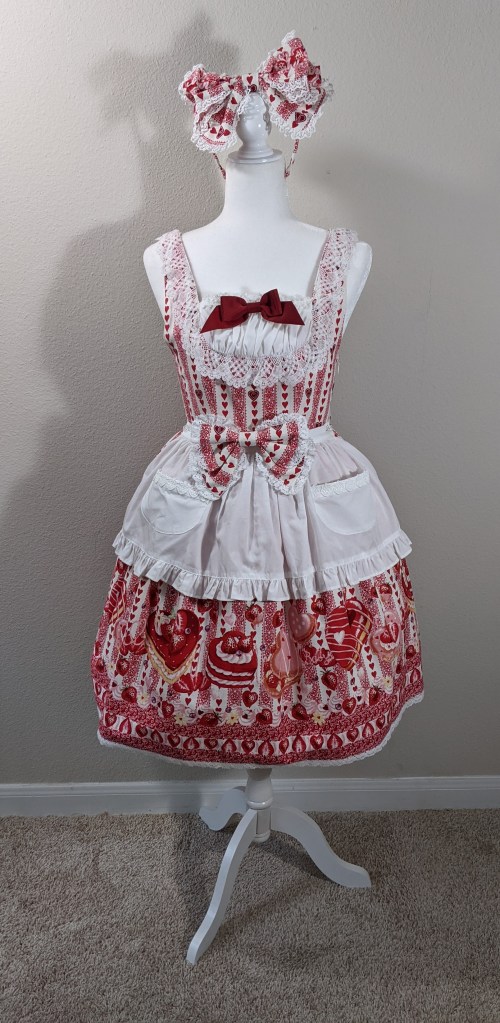
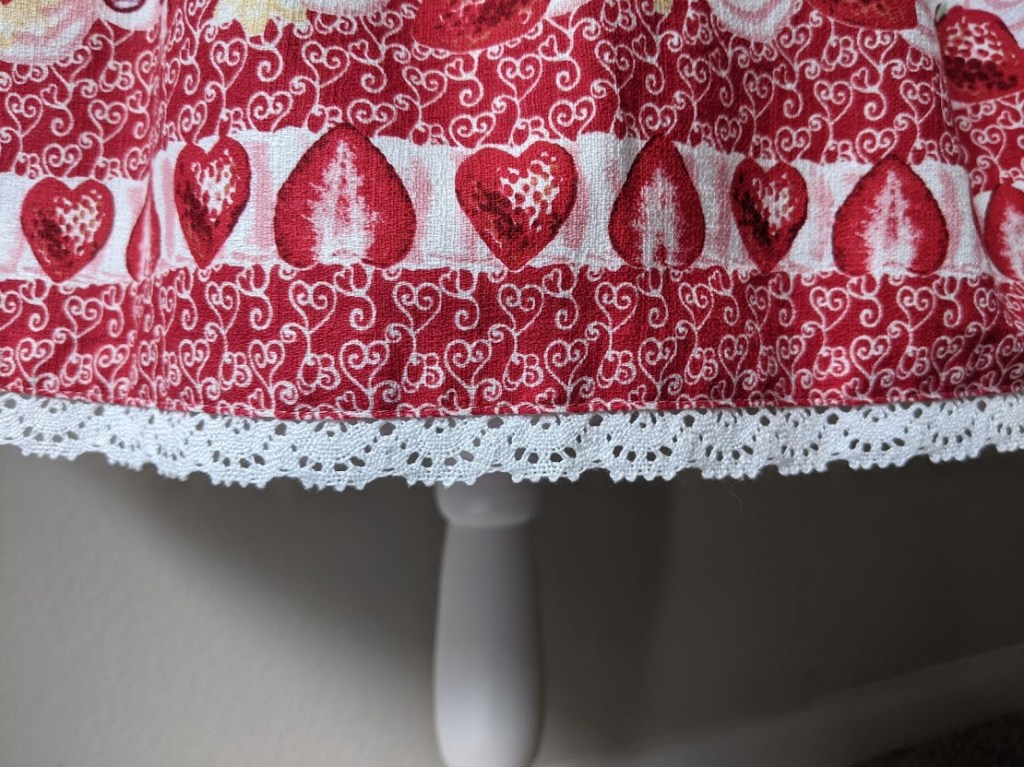
This is one of those prints that really doesn’t photograph well due to the small pattern. If you have ever taken a picture of a small polka dot pattern you know what I am talking about. The busy print looks fuzzy or condensed in an odd way in photos. I have noticed it is better with the other colorways of this dress. I think it is the stark contrast of the red on white. Hopefully some of the detail shots will give you a better idea of the charm this dress has in person.

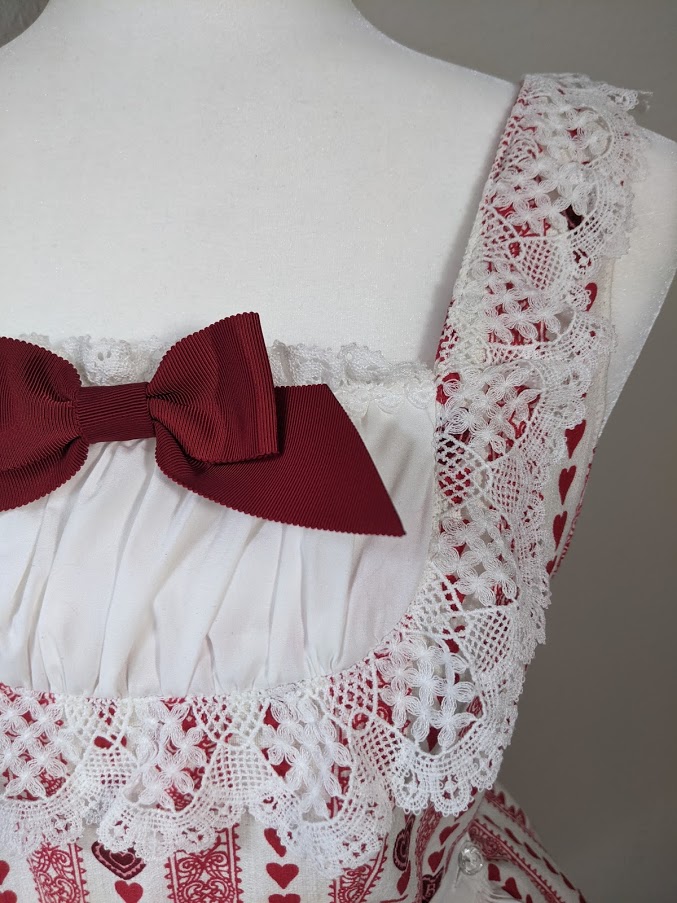
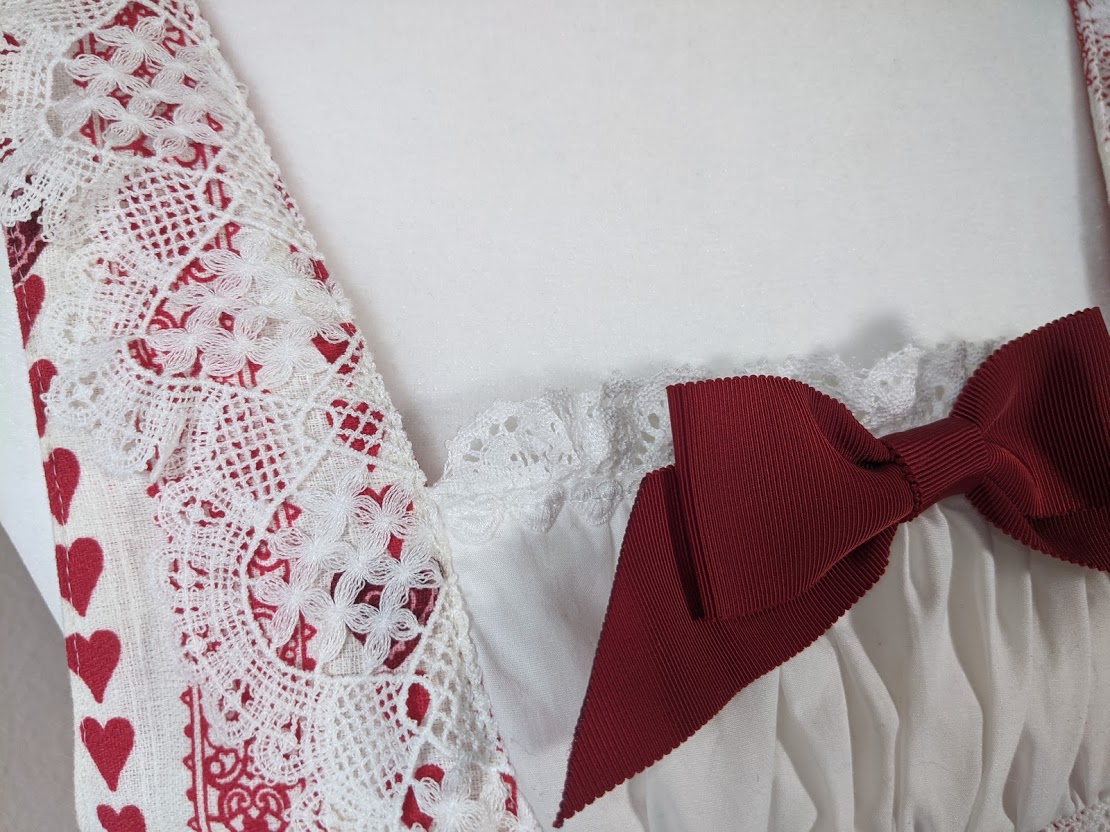
The bodice lace is one of the standard Baby laces that you often see on their blouses. It makes it really easy to create a cohesive look if you are a person who likes their lace to match.

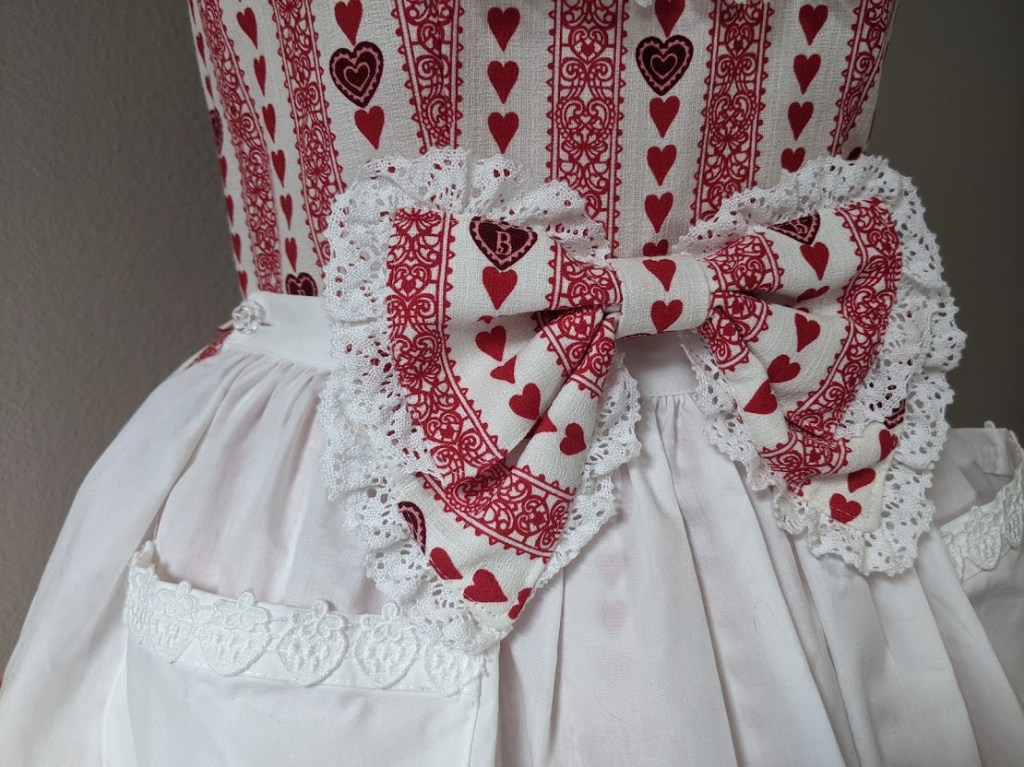
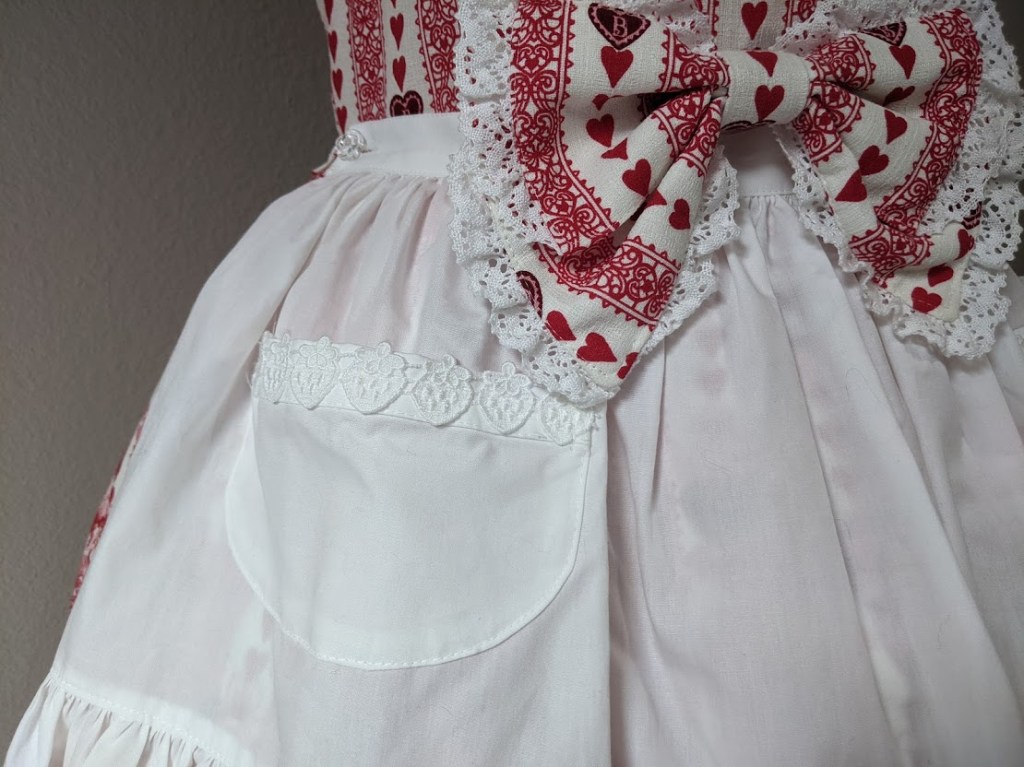
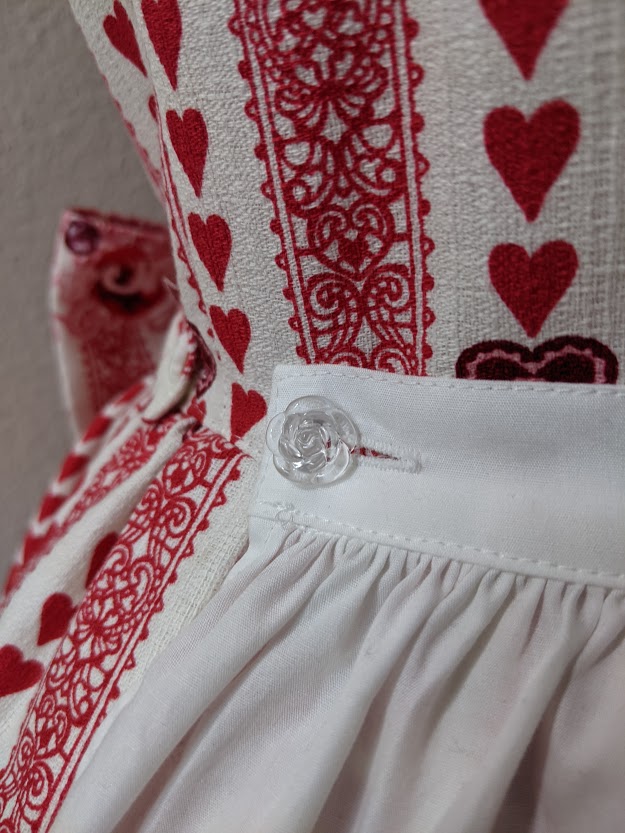
The bow on the waist is detachable with a small pin for a little more versatility. The apron is removeable with little rose shaped buttons! They are clear so if you choose to take it off they are not too eye-catching.

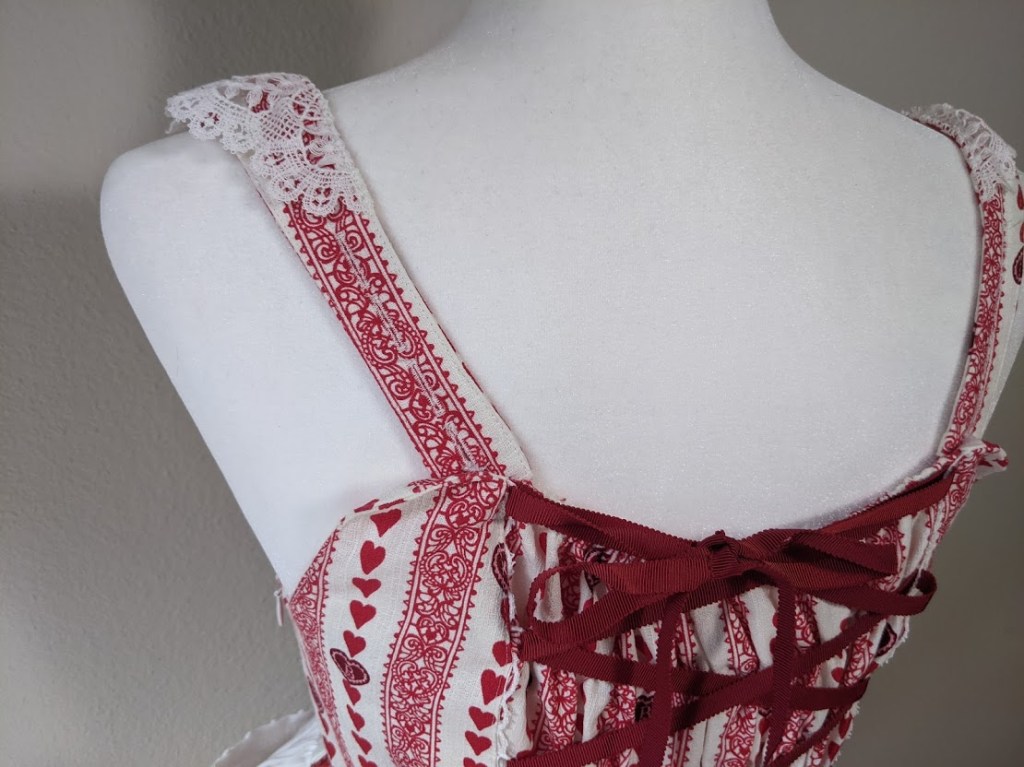
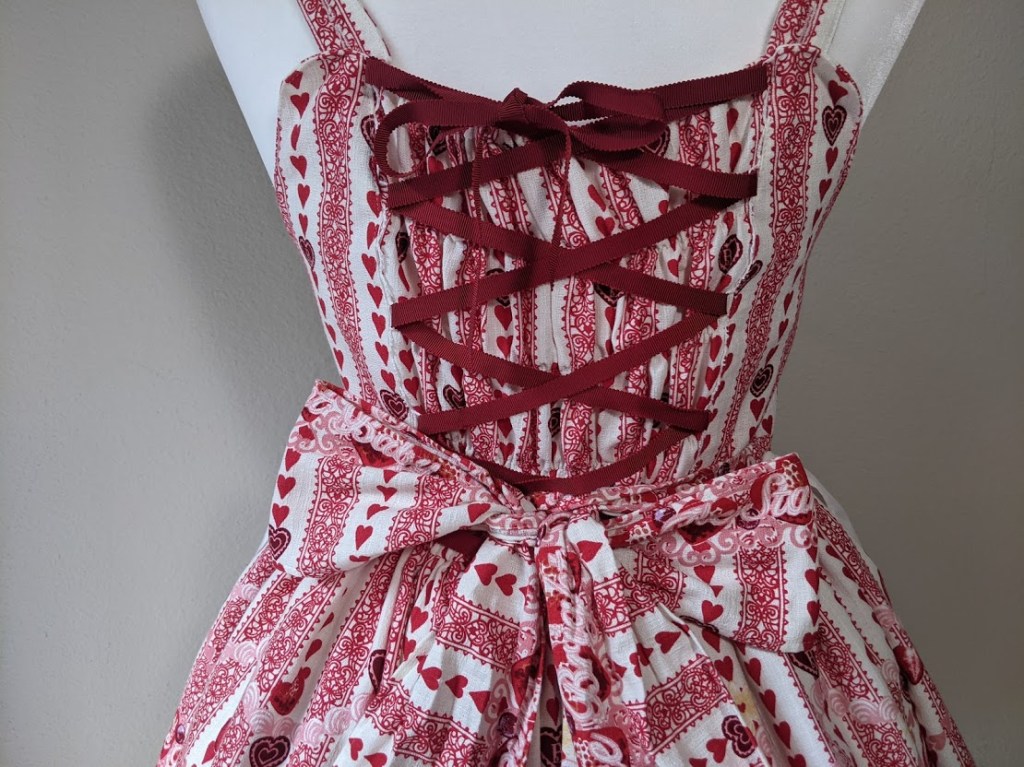
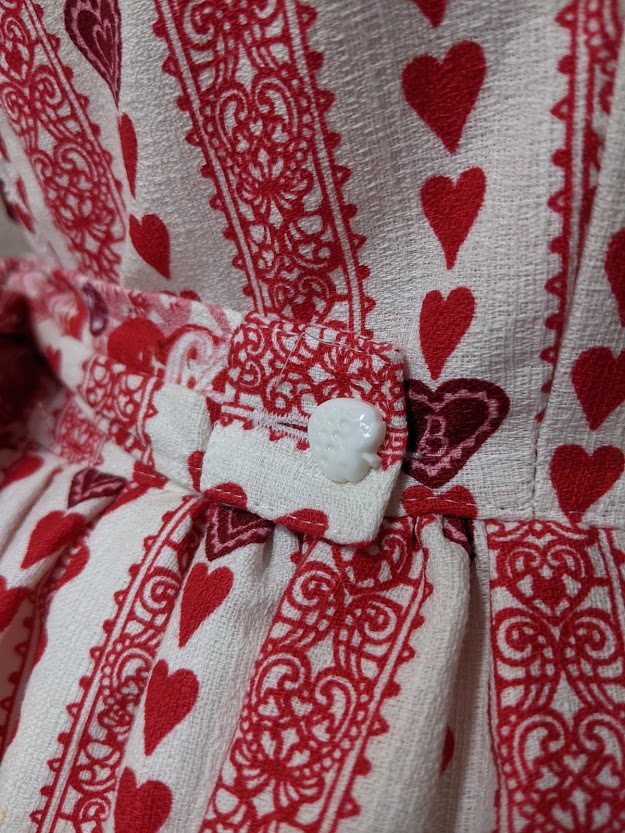
The straps have four button holes to adjust the length of the straps. The bending on the fabric where they attach is due to the shape of the mannequin so please excuse that. Back lacing is pretty standard with looped lace to hold it in place over shirring. The waist ties are detachable, held to the dress by matching strawberry buttons. I wonder if they are different colors on other colorways to blend in.

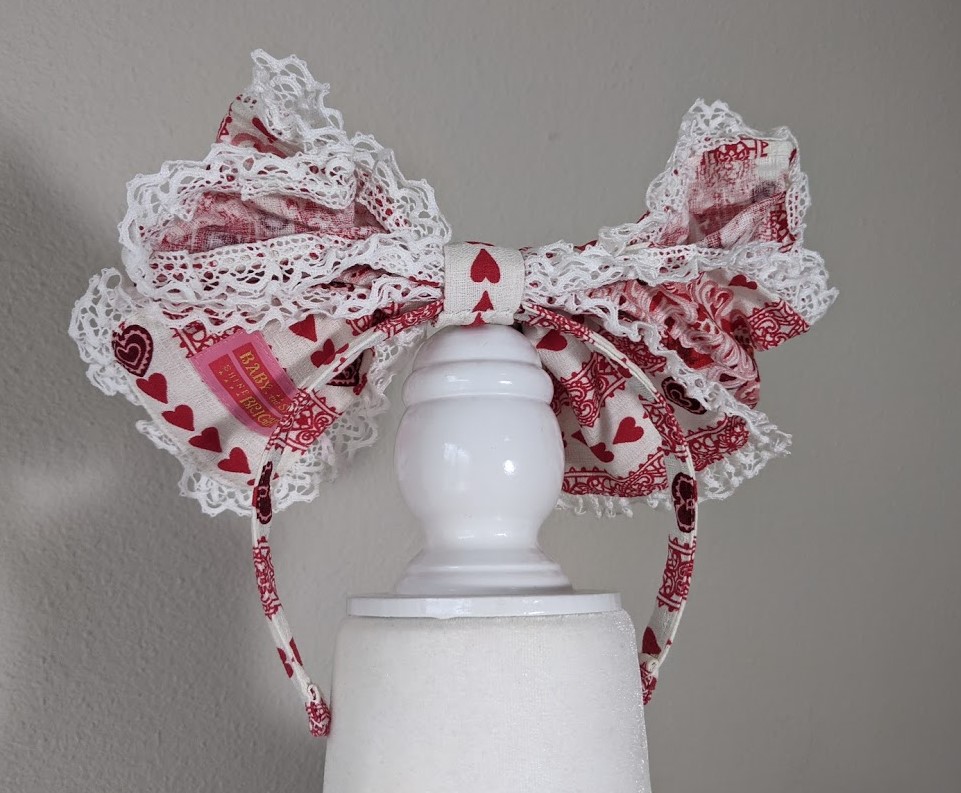
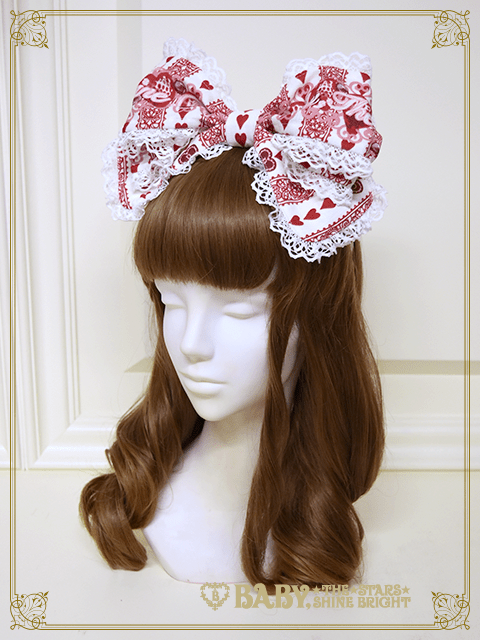
The headbow is wired so you can adjust it close to your head for a more subdued look or puff it up for maximum height!

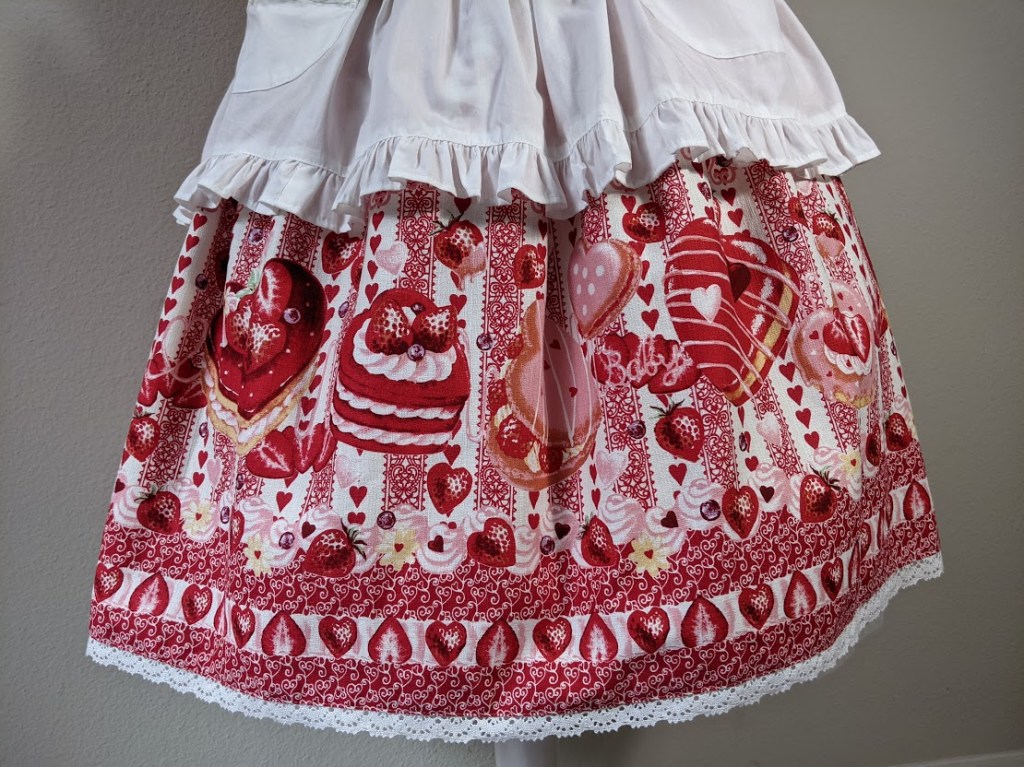
And last but not least some close up photos of the print. While the Ivory color does have a problem of looking too busy to be photographed easily, in person it show off the background lace pattern that is more subtle on the other colors. I never noticed before looking closely for these photos that it has a swirl of pink frosting looping around behind the larger sweets to form more hearts and the word “Baby”. So cute!

While I was so excited to get my hands on this dress the cut is a little odd on me due to my long torso so I have purchased the red colorway of the JSK 1 cut. When it gets here I will make a post so we can compare the differences.

I hope you enjoyed the detail shots and if there is anything more you would like to know about the dress just ask! I would be happy to add more photos or information on request.

See you next time ♡

Oh Kumya, What Have I Done?: The story of my Baby the Stars Shine Bright Phone Case Repair

It is probably fine if I just skip my introductory post, right? Let’s just skip to the part where I messed up the other day.

A few weeks ago a BTSSB phone case that I had been eyeing for a couple years came up for sale secondhand. When it was in store I would talk myself out of it because it felt so frivolous to pay so much for a phone case I would have to put another phone case in to protect my phone. Kind of defeats the purpose, right? Well, lolita is not a hobby ruled by logic. When one popped up on Lace Market lightly used in a color that matches almost every dress I own my willpower fizzled out.

No regrets.

The only problem was that since it was used the tape to attach your phone or case to had already been used. So I bought some intense Gorilla Glue Tape. I was a fool. Not that the tape would not hold the phone to the case, it did it so well…it did it so well that when I tried to reposition the phone case I snapped the plastic that held in the slider. I had my wonderful treasure for about 5 minutes before my ham hands destroyed it.

After some panicking and telling myself that it “wasn’t that bad” I did determine it was indeed that bad as I threw my phone on some asphalt trying to put it in my purse. With the mechanism broken the phone was completely unsecured making the case pointless.

A little regret.

For awhile I was too afraid to do anything. It still looked cute! I can just keep a piece of cute garbage, I told myself. In the end it just made me sad to look at knowing how quickly I had bungled something so simple, so I came up with an idea.

I bought a cheap phone case off Ebay for $5 and used a knife to pry off the shifting mechanism.

This was pretty easy! I wasn’t too worried about messing up the pleather so it came off quickly. Just wedge the knife under the plastic and twist. The real pain came in taking off the adhesive on the back. Glue does not stick well to glue, so it is very important you do not skip this super annoying step. It took me about 40 minutes to get it off with a mix of acetone and Goo Gone. After removing it completely be sure to wash the residue off with some soap and water to make sure it doesn’t interfere with the adhesive. After that I just scuffed it up a bit with some sandpaper for extra grip. Good to go!

This was a huge pain, but worth it!

Now for the part I was dreading. I had to cut the old base off the phone case and it felt reeeeeeal bad. As expected of Baby the Stars Shine Bright the quality was better and the mechanism was glued directly on to the sheet of pleater. I had to cut through it. If I had just pulled it off it may have created a rip in a visible place, so as much as I hated to do it…

Aaaaaaaaaaaaa

The final result is worth it, I swear! To make sure the pleather did not unravel further once the phone case was placed on it I took the glue and did a coat around the edge of the fraying material. It doesn’t look too nice, but I believe this will help the pleather from moving around under the plastic bit during use.

All that is left is to glue down the plastic mechanism. For this I took a paint brush and made sure to coat the entire back touching the case. As my cut was (somewhat) neat the plastic bit easily covered the entire frayed area! I was a little worried, but it looks surprisingly clean! Good as new! No one would know, except me who will always be haunted by the shame of when I Hulked apart a nice brand piece. :’)

Thanks for reading! Maybe this will help someone out there. Maybe you can just laugh at my pain. If you have any questions just let me know and expect more lolita fashion specific posts soon!